Introduction
Understanding Vue.js
Vue.js has rapidly become one of the most favored JavaScript frameworks for building user interfaces. This framework, developed by Evan You, offers developers a flexible, approachable, and versatile approach to creating dynamic applications. What sets Vue.js apart is its focus on the view layer, allowing developers to incrementally adopt it.
Some key features of Vue.js include:
- Reactive Data Binding: It automatically syncs the data between the model and view.
- Component-Based Architecture: Developers can create reusable components for better organization.
- Simplified Integration: It can be integrated into projects alongside other libraries or frameworks seamlessly.
By leveraging these features, developers can build robust Single Page Applications (SPAs) that perform exceptionally well.
Importance of Single Page Applications
Single Page Applications (SPAs) have transformed the web development landscape by providing a smoother and more seamless user experience. With SPAs, entire page content loads dynamically without refreshing the page, making the application feel faster and more fluid.
Consider using a SPA for your next project because:
- Enhanced User Experience: Users enjoy faster navigation and reduced wait times.
- Improved Performance: SPAs can be optimized to load essential resources once, thereby speeding up subsequent interactions.
- Reduced Server Load: Loading fewer resources decreases the demand on servers, resulting in cost and resource savings.
Transitioning from traditional multi-page applications (MPAs) to SPAs can enhance usability and engagement, making Vue.js an excellent choice for such developments.

Setting Up Vue.js Development Environment
Installing Node.js and npm
To get started with Vue.js, the first step is to establish your development environment by installing Node.js and npm (Node Package Manager). Node.js is essential as it enables you to run JavaScript on the server side, while npm allows you to manage dependencies more effortlessly.
Here’s a quick guide to get you set up:
- Download Node.js:
- Visit the official Node.js website and download the version suitable for your operating system.
- Install:
- Follow the installation prompts to install Node.js. npm is bundled with it.
- Verify Installation:
- Open your terminal (Command Prompt or Terminal) and type:
node -vnpm -v
- You should see the version numbers if the installation was successful.
- Open your terminal (Command Prompt or Terminal) and type:
Creating a Vue.js Project
With Node.js and npm set up, creating a Vue.js project is a breeze! The Vue CLI (Command Line Interface) is a powerful tool that helps you scaffold projects effortlessly.
Follow these steps:
- Install Vue CLI:
- In your terminal, run:
npm install -g @vue/cli
- In your terminal, run:
- Create a New Project:
- To generate a new project, execute:
vue create my-project - Replace
my-projectwith your preferred project name.
- To generate a new project, execute:
- Navigate into Your Project:
- Once created, navigate to your new project's directory:
cd my-project
- Once created, navigate to your new project's directory:
Congratulations! You’ve laid the groundwork for building a Single Page Application with Vue.js. In the upcoming sections, you’ll delve into the exciting components that embody this powerful framework.
Vue Components and Single File Components
Introduction to Vue Components
Components are the lifeblood of Vue.js applications, enabling you to build reusable, encapsulated elements that enhance maintainability and scalability. Think of components as separate pieces of a puzzle, each handling its specific functionality—making your application more organized and easier to manage.
Here’s why Vue components are widely appreciated:
- Reusability: Create a component once and use it throughout your application.
- Encapsulation: Components can contain their logic, markup, and styles without affecting others.
- Modularity: Breaking down large applications into smaller components simplifies development.
For instance, imagine building a user profile page. Instead of writing all HTML and JavaScript in one file, you can create components for the header, profile picture, and user details, enhancing clarity and cohesion.
Implementing Single File Components
Single File Components (SFCs) take the power of Vue components a step further by consolidating the template, script, and style sections into one file, making development a breeze.
Here’s how to implement SFCs:
- Create an SFC: Typically, these files have a
.vueextension. For example, create a file namedUserProfile.vue. - Structure of an SFC:
<template><div class="user-profile">
<h1>User Profile</h1>
</div>
</template>
<script>
export default {
data() {
return {
// User data here
};
},
};
</script>
<style scoped>
.user-profile {
/* Styles here */
}
</style>
Each section—template, script, and style—stays organized, allowing for a seamless development experience. By harnessing the power of Vue components and SFCs, developers can build sophisticated Single Page Applications with minimal hassle.

Routing in Vue.js
Setting up Vue Router
A critical aspect of creating dynamic Single Page Applications (SPAs) in Vue.js is managing routing, and that's where Vue Router comes into play. Setting up Vue Router is straightforward and can significantly enhance your application’s navigation experience.
Here’s how to set it up:
- Install Vue Router: First, ensure you're in your project's directory. Then, run:
npm install vue-router - Create a Router File: Next, create a new file named
router.jsin yoursrcdirectory. - Basic Configuration:
import Vue from 'vue';import Router from 'vue-router';
import Home from './components/Home.vue';
import About from './components/About.vue';
Vue.use(Router);
export default new Router({
routes: [
{ path: '/', component: Home },
{ path: '/about', component: About },
],
});
- Register the Router in Main File: Lastly, integrate the router in your
main.jsfile:import Vue from 'vue';import App from './App.vue';
import router from './router';
new Vue({
render: h => h(App),
router,
}).$mount('#app');
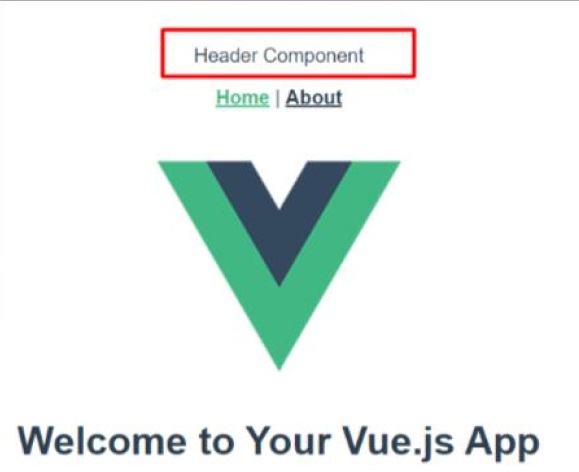
Implementing Routes in a Single Page Application
With Vue Router set up, implementing routes in your SPA is a breeze. Routes allow users to navigate between different views without the need for traditional page reloads.
To implement the routes:
- Define Route Views: In your main component (e.g.,
App.vue), include the<router-view />tag, where your routed components will render:<template><div id="app">
<router-view></router-view>
</div>
</template>
- Use Navigation Links: For user-friendly navigation, leverage
<router-link>tags. Here’s an example:<template><nav>
<router-link to="/">Home</router-link>
<router-link to="/about">About</router-link>
</nav>
</template>
By following these steps, you can create a seamless routing experience. Vue Router provides the necessary tools to manage navigation, making your Single Page Application more interactive and engaging. With these setup and implementation steps, developers can enhance user experience and ensure smooth, responsive navigation throughout their applications.
State Management with Vuex
Introduction to Vuex
When building complex applications with Vue.js, managing application state can become challenging. This is where Vuex comes in, acting as a centralized store to manage all the state across your components, ensuring a predictable state management pattern.
Vuex is designed exclusively for Vue.js applications, allowing for:
- Centralized Data: All state data is stored in one location, making it easier to manage.
- Predictable State Mutations: Changes to the state are clearly defined, which improves debugging and testing.
- Integration with Vue DevTools: You can monitor the state changes in real-time, helping developers pinpoint issues quickly.
It operates on the principle of a "store" that contains the state, allowing components to access or modify this state seamlessly.
Managing Application State with Vuex
To manage state effectively with Vuex, you will typically follow these steps:
- Install Vuex:
npm install vuex - Set Up the Store: Create a
store.jsfile:import Vue from 'vue';import Vuex from 'vuex';
Vue.use(Vuex);
export default new Vuex.Store({
state: {
count: 0,
},
mutations: {
increment(state) {
state.count++;
},
},
});
- Accessing State in Components: You can access the state from any component using the
$storeobject:computed: {count() {
return this.$store.state.count;
},
},
- Committing Mutations: To modify the state, you use the
commitfunction:methods: {increment() {
this.$store.commit('increment');
},
},
By adopting Vuex for state management, developers enhance the maintainability and scalability of their Single Page Applications. This centralized approach not only simplifies data flow but also provides an organized structure, making collaborative development and debugging far more efficient.

Implementing API Calls in Vue.js
Using Axios for HTTP Requests
As you move deeper into building your Vue.js application, the need to integrate external data becomes crucial. That's where Axios, a promise-based HTTP client for the browser and Node.js, comes into play. Axios simplifies making API calls, enabling you to interact with back-end services with ease.
To get started with Axios in Vue.js:
- Install Axios:
npm install axios - Import Axios: In your component, import Axios and set it up:
import axios from 'axios';
The beauty of Axios lies in its straightforward syntax for making GET, POST, or any other type of requests, allowing you to specify headers and handle responses seamlessly.
Consuming APIs in a Vue.js Application
To consume APIs effectively in your Vue.js application, you can follow these simple steps:
- Make a GET Request: In your component, utilize the
mounted()lifecycle hook to fetch data:export default {data() {
return {
items: [],
};
},
mounted() {
axios.get('https://api.example.com/data')
.then(response => {
this.items = response.data;
})
.catch(error => {
console.error('There was an error fetching the data:', error);
});
},
};
- Display the Data: Use the fetched data directly in your template:
<template><div>
<ul>
<li v-for="item in items" :key="item.id">{{ item.name }}</li>
</ul>
</div>
</template>
By integrating Axios into your Vue.js application, you create a powerful environment for consuming APIs efficiently. This not only enriches the user experience with dynamic data but also enhances the overall functionality of your Single Page Application. Whether you are fetching user data, product listings, or any other external information, Axios ensures smooth and reliable communication with APIs.

Styling and Designing a Single Page Application
Using CSS Preprocessors with Vue
When it comes to styling your Vue.js Single Page Application (SPA), utilizing CSS preprocessors can elevate your design game significantly. Preprocessors like Sass or Less enable developers to use features like variables, nesting, and mixins, which streamline the CSS management process.
For example, imagine you have a consistent color scheme throughout your application:
- Install Sass:
npm install sass sass-loader --save-dev - Using Sass in your Component:
<style lang="scss" scoped>$primary-color: #42b983;
.app {
color: $primary-color;
h1 {
font-size: 2em;
}
}
</style>
By incorporating a preprocessor, you can write more organized and maintainable styles, making it easier to adapt your design as your application evolves.
Implementing UI Frameworks Like Vuetify
To further enhance the aesthetic and functional elements of your Vue.js application, consider using UI frameworks like Vuetify. Vuetify is based on Material Design and offers a rich set of pre-styled components, making it a breeze to create an attractive and responsive layout.
To implement Vuetify in your application:
- Install Vuetify:
vue add vuetify - Using Vuetify Components: You can easily integrate components such as buttons, cards, and navigation bars right in your templates:
<template><v-container>
<v-btn color="primary">Click Me!</v-btn>
<v-card>
<v-card-title>Welcome to Vuetify</v-card-title>
<v-card-text>This is a simple card example.</v-card-text>
</v-card>
</v-container>
</template>
By leveraging CSS preprocessors and UI frameworks like Vuetify, developers can create visually stunning and user-friendly SPAs. This combination allows for both flexibility in design and powerful functionality, culminating in a polished end product that engages users effectively.

Optimizing Performance and SEO
Vue.js Performance Optimization Techniques
As your Vue.js Single Page Application (SPA) grows, ensuring optimal performance becomes crucial for user satisfaction. Here are some effective optimization techniques to consider:
- Lazy Loading: Implement lazy loading for components to load only what’s necessary. This reduces initial load time and improves performance.
const UserProfile = () => import('./components/UserProfile.vue'); - Code Splitting: Use dynamic imports to split your code based on routes, thereby only loading the relevant code for the current view.
- Optimize Images: Compress and resize images to reduce load times and enhance user experience. Utilize formats like WebP for better compression.
By applying these strategies, you can significantly enhance your application’s responsiveness and efficiency.
SEO Best Practices for Single Page Applications
Optimizing your Single Page Application for search engines can be challenging but rewarding. Here are some best practices to follow:
- Server-Side Rendering (SSR): Consider using tools like Nuxt.js, which offers SSR out of the box, allowing search engines to crawl and index your site effectively.
- Meta Tags: Ensure that each page has unique meta tags for titles and descriptions to improve visibility on search engines.
- Sitemap and Robots.txt: Create a sitemap and a robots.txt file to facilitate better indexing by search engines.
- Async Data Fetching: Fetch data asynchronously to improve performance while still delivering SEO-friendly content.
By combining performance optimization techniques with solid SEO practices, your Vue.js SPA can achieve faster load times, better user engagement, and improved search engine rankings, ultimately driving more traffic to your application.
Testing and Debugging Vue.js Applications
Writing Unit Tests for Vue Components
Testing is a vital component of software development that ensures your Vue.js applications function as intended. Writing unit tests for Vue components is crucial for catching bugs early and ensuring your code is reliable. The most common framework for this purpose is Jest, often complemented by Vue Test Utils.
Here’s how to get started with unit tests:
- Install the Required Packages:
npm install --save-dev @vue/test-utils jest - Create a Test File: For a component named
MyComponent.vue, create a file calledMyComponent.spec.js. - Write Your Test:
import { shallowMount } from '@vue/test-utils';import MyComponent from '@/components/MyComponent.vue';
describe('MyComponent.vue', () => {
it('renders a message when passed', () => {
const msg = 'Hello World!';
const wrapper = shallowMount(MyComponent, {
propsData: { msg },
});
expect(wrapper.text()).toMatch(msg);
});
});
By writing unit tests, you can ensure that your components behave as expected, thus enhancing overall application stability.
Debugging Techniques in Vue.js
Debugging is another essential skill for developers to identify and fix issues effectively. In Vue.js, several techniques can streamline your debugging process:
- Vue DevTools: This browser extension provides a powerful interface to inspect Vue components, view Vuex state, and track events in real-time.
- Using Console Log Statements: Often, the simplest method to debug code is to insert
console.log()statements throughout your components to track data flow and identify where things might be going wrong. - Error Handling: Implement error handling in your components using
try-catchblocks or Vue’serrorCapturedlifecycle hook, allowing you to manage errors more effectively.
By mastering unit testing and debugging techniques, developers can enhance the reliability and maintainability of their Vue.js applications. This proactive approach not only saves time but also results in a smoother experience for end users.
Deployment and Hosting of Vue.js SPA
Building Vue.js Project for Production
After meticulously developing your Vue.js Single Page Application (SPA), it’s time to prepare it for deployment. Building your project for production optimizes the code for performance, ensuring that your application runs efficiently for users.
Here’s a simple step-by-step guide for building your Vue project:
- Run the Build Command:
Open your terminal and navigate to your project directory, then execute:
npm run build - Understand the Output: This command generates a
dist(distribution) folder containing the minified and optimized files that are ready for deployment. - Review Configuration: Ensure your
vue.config.jsis configured correctly for production. For instance, set the public path if you're hosting in a subdirectory.
With the build complete, your application is ready to be served to users!
Hosting Options for Single Page Applications
When it comes to hosting your Vue.js SPA, you have several options that cater to different needs and budgets. Here are some popular choices:
- Netlify: Offers a seamless deployment experience with serverless functions and easy continuous integration.
- Vercel: Known for its speed and reliability, Vercel is excellent for frontend frameworks and provides instant CI/CD.
- GitHub Pages: Ideal for static sites and free for public repositories, you can host your SPA directly from your GitHub repo.
- AWS Amplify or Firebase: Great for scalable applications, these cloud services offer robust hosting along with backend services.
Each option has its unique advantages, so choose one that aligns best with your project requirements and growth plans. By deploying your Vue.js SPA on a reliable hosting platform, you ensure that users have a fast and enjoyable experience while accessing your application.
Conclusion
Recap of Building a Single Page Application with Vue.js
Building a Single Page Application (SPA) with Vue.js is both an exciting and rewarding endeavor. Throughout this guide, you’ve learned how to set up your development environment, create components, manage state, handle routing, and implement API calls. Here’s a quick recap of key steps:
- Setting Up: You established a clean development environment with Node.js, npm, and Vue CLI.
- Vue Components: You harnessed the power of Vue components and Single File Components (SFCs) for modular design.
- Routing and State Management: You implemented Vue Router for navigation and Vuex for efficient state management.
- Styling and Optimization: You styled your application with CSS preprocessors and UI frameworks, while also focusing on performance and SEO.
- Deployment: Finally, you learned about building your application for production and various hosting options.
Each of these steps contributes to delivering a high-quality user experience.
Further Learning Resources
To deepen your understanding and expertise in Vue.js, consider exploring the following resources:
- Vue.js Official Documentation: The primary resource for in-depth knowledge and updates.
- Vue Mastery: Offers comprehensive video tutorials and courses on Vue.js.
- Courses on Udemy or Coursera: Look for courses specifically tailored to learning Vue.js and its ecosystem.
- Community Forums: Engage with the Vue community on platforms like Discord or Stack Overflow for help and shared experiences.
By continuing your education, you can refine your skills and stay updated with the latest developments in Vue.js, ensuring that you create exceptional SPAs for users. Happy coding!